🔁 Supply & Demand Zones – Real Moves Start Here! 💥
Ever wonder where the big money actually enters and exits? It's all about imbalances between buyers and sellers – and that's exactly what Supply & Demand Zones show us.$ETH
If you're tired of getting caught in fake breakouts or late entries… this is what you need to learn. 👇
---
🔍 What Are Supply & Demand Zones?
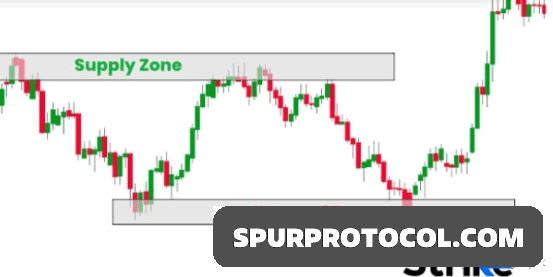
🟥 Supply Zone = A price area where sellers are stronger than buyers → Price drops from here
🟩 Demand Zone = A price area where buyers take control → Price jumps up from here
These zones form when price leaves an area aggressively, leaving behind a clear “footprint” of smart money. Price often comes back to test these zones before the next move.
---
📌 How to Spot Them
Demand Zone (Buyers Step In):
1️⃣ Price moves down
2️⃣ Creates a base (2–3 small candles)
3️⃣ Sharp move upward
➡️ That base = Demand Zone
Supply Zone (Sellers Take Over):
1️⃣ Price moves up
2️⃣ Forms a base
3️⃣ Sharp drop down
➡️ That base = Supply Zone
---
💡 Why These Zones Matter
✔️ High Accuracy Entries
✔️ Smart Money Logic — Big players trade here
✔️ Less Risk — Clean stop-loss placements
✔️ More Reward — You enter before the move begins
---
📈 How to Trade These Zones
💚 Demand Zone (Buy Setup):
✅ Wait for price to revisit the demand zone
✅ Look for bullish signs (wicks, engulfing candles)
✅ Enter long
✅ Stop-loss just under the zone
✅ Target recent high or supply zone